Attachments in e-mails
Adding attachments to your e-mail communication takes two steps:
1. Uploading the file to Foxdeli
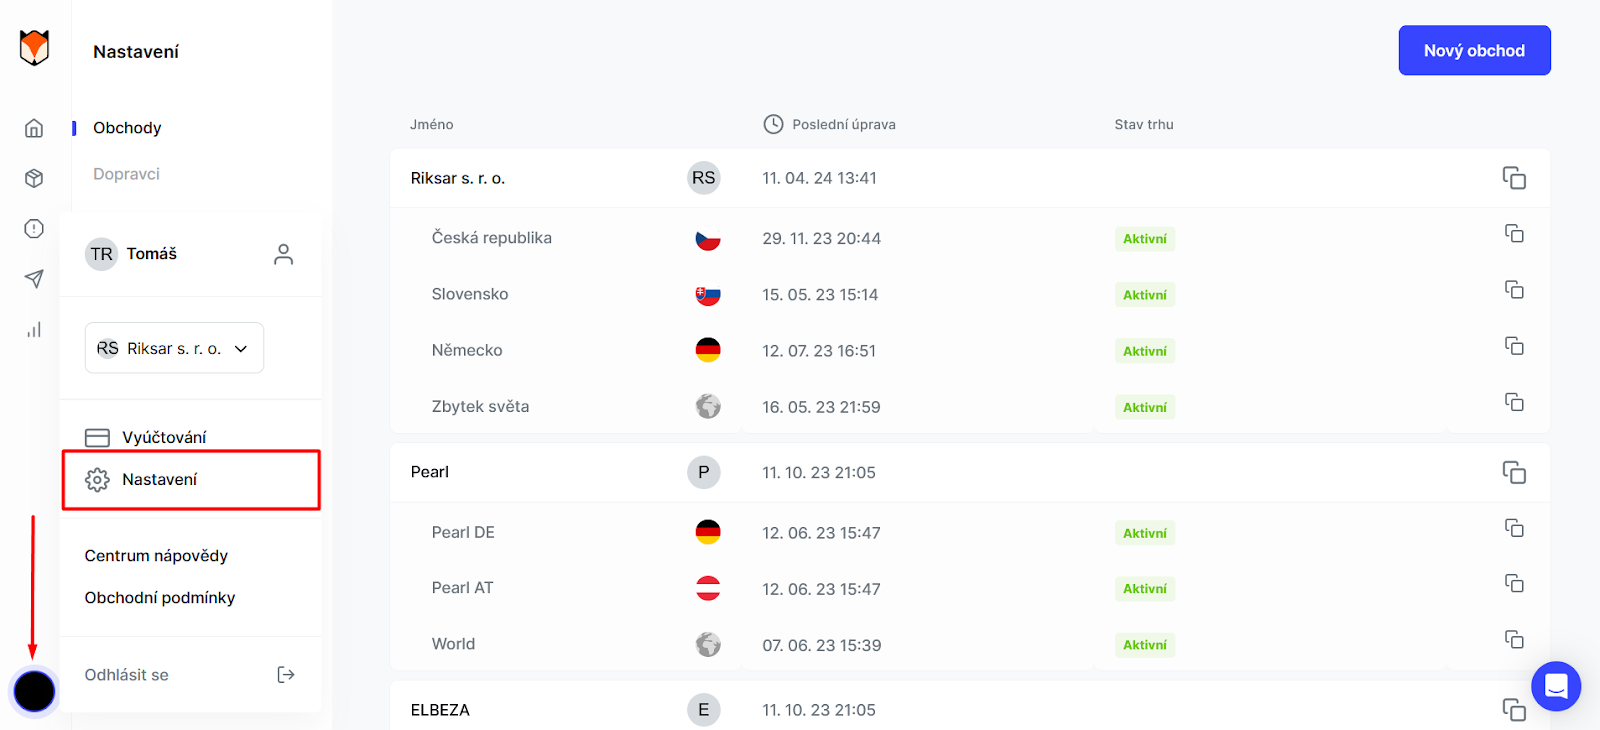
You upload files to the app in your account (your e-shop's icon in the bottom left corner) after clicking Settings. Select the e-shop you want there. The store's page opens, and at the bottom of it you'll find the Files section.
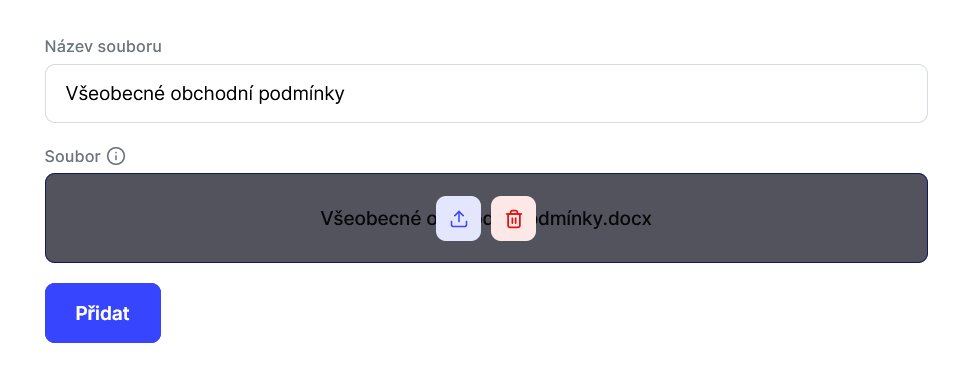
To upload a new file to the app, use the Upload file button and fill in the file name. Then simply drag the files from your computer into the marked area or upload them by clicking the upload icon.
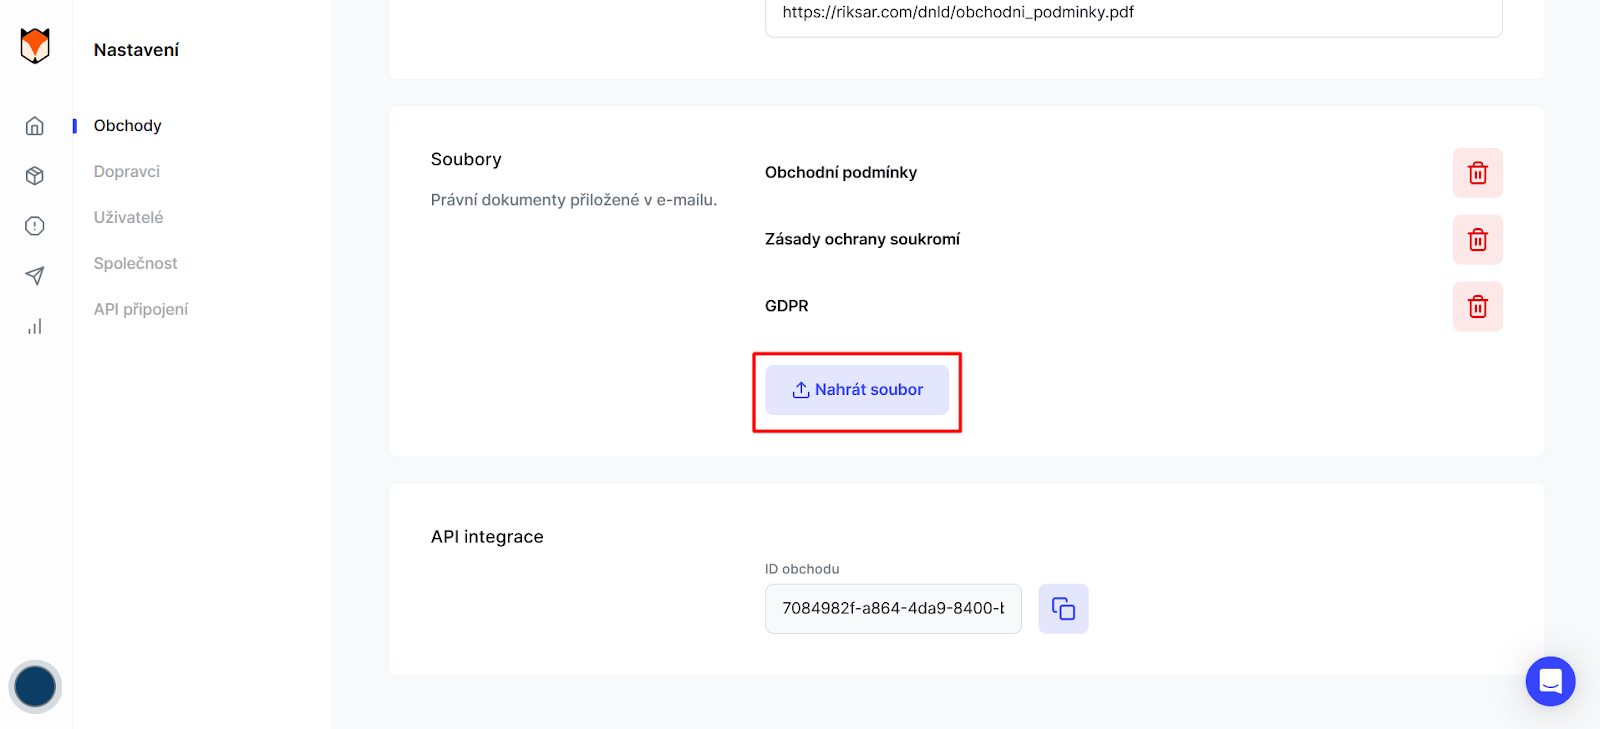
All uploaded files are then shown in this section. You can remove them from the app with the Trash button.
Confirm all actions with the Save changes button at the top of the screen.
2. Adding an attachment to a mailing
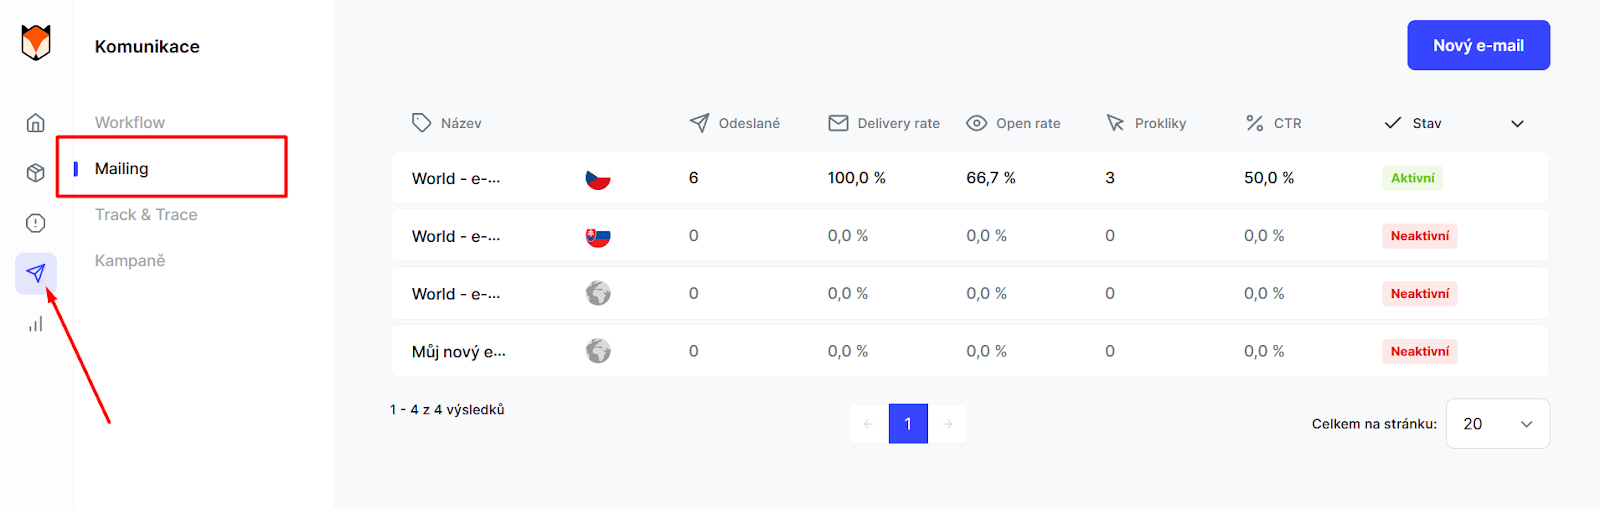
You add attachments to an e-mail template in the Communication section (arrow icon) in the left navigation menu, where you select Mailing and then the e-mail template you want.
In the right part of the e-mail template, in the Modules section, go to the Select files field and tick the checkbox next to the files you want to send to customers as e-mail attachments.
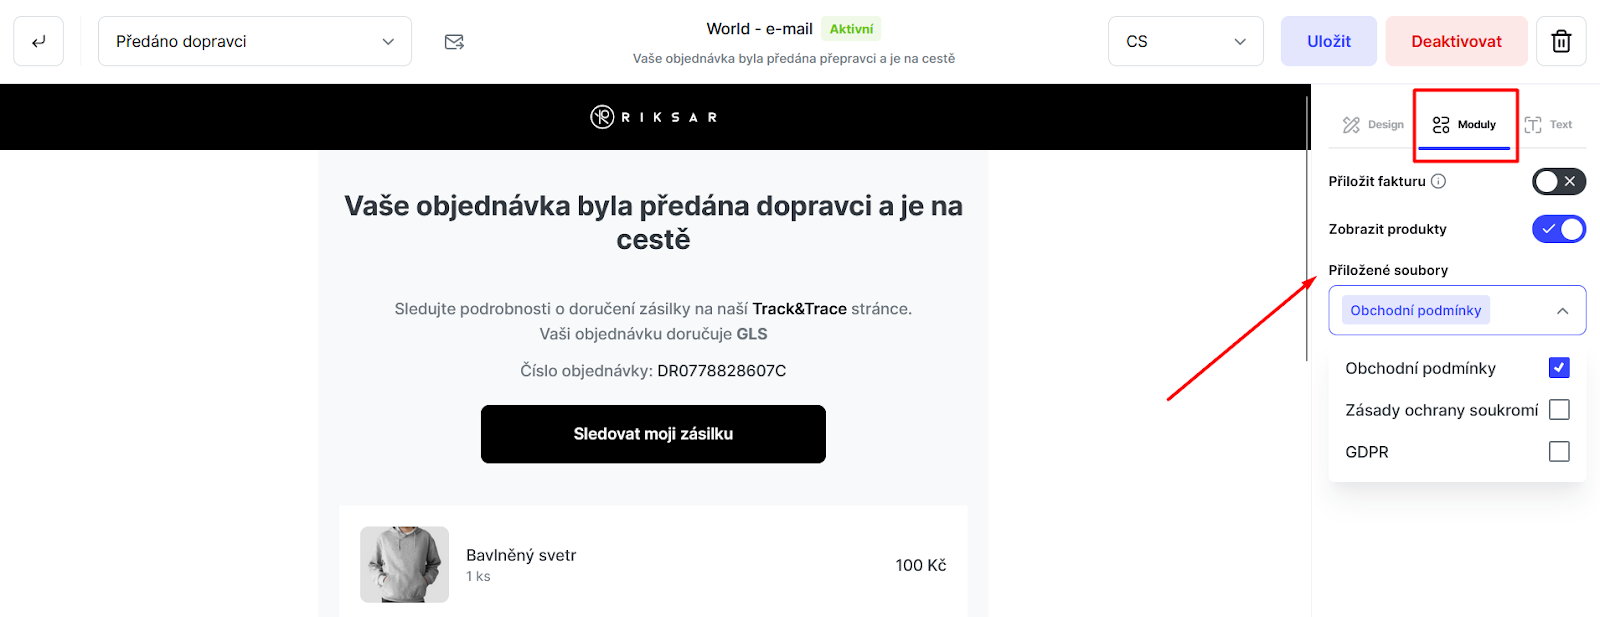
To remove a file from the e-mail template, just untick the checkboxes next to the files. This doesn't delete the files from the app; they just won't be sent to customers as e-mail attachments any more. You can delete uploaded files completely in your account settings.
Confirm all actions with the Save button at the top of the screen.
Still have questions?
Contact usMore articles in this category
- Billing address in e-mails by delivery method
- Brick-and-mortar pickup places for personal pickup
- Campaigns – a banner in e-mails and on the Track & Trace page
- Delayed due to carrier time constraints – a workflow status
- Duplicating templates, campaigns and workflows
- E-mails and SMS in the order timeline
- Emoji in the e-mail, Track & Trace and SMS editors
- Fallback SMS when an e-mail doesn't arrive
- How to turn on e-mail communication: working with Workflow
- Orders in the Seznam Email order overview
- Preview text of delivery e-mails
- Sending e-mails from your own domain (DKIM verification)
- SMS statistics
- SMS to customers
- Withdrawal from contract – button in delivery e-mails
- Recommended products
- UTM parameters in links
- Connecting your e-shop to Foxdeli – Shopify app
- Getting started with Foxdeli
- Connecting multiple stores to one account
- Payment details in the order summary
- Auto-filling data in the e-mail subject
- Customer PIN code in the e-mail
- Info banner
Articles in this category
- Billing address in e-mails by delivery method
- Brick-and-mortar pickup places for personal pickup
- Campaigns – a banner in e-mails and on the Track & Trace page
- Delayed due to carrier time constraints – a workflow status
- Duplicating templates, campaigns and workflows
- E-mails and SMS in the order timeline
- Emoji in the e-mail, Track & Trace and SMS editors
- Fallback SMS when an e-mail doesn't arrive
- How to turn on e-mail communication: working with Workflow
- Orders in the Seznam Email order overview
- Preview text of delivery e-mails
- Sending e-mails from your own domain (DKIM verification)
- SMS statistics
- SMS to customers
- Withdrawal from contract – button in delivery e-mails
- Recommended products
- UTM parameters in links
- Connecting your e-shop to Foxdeli – Shopify app
- Getting started with Foxdeli
- Connecting multiple stores to one account
- Payment details in the order summary
- Auto-filling data in the e-mail subject
- Customer PIN code in the e-mail
- Info banner